


Every device on your network makes hundreds of DNS lookups an hour. Some of those lookups are for the sites you actually asked for. A lot of them are for ad servers, trackers, and telemetry endpoints you never chose to talk to. Pi-hole sits in the middle of that traffic and quietly refuses to answer the requests you do not want, for every phone, laptop, TV, and smart plug on your network at once.
This is the whole guide: what Pi-hole is, how the blocking actually works, how to set it up properly, and where it fits next to AdGuard Home, Technitium, and the cloud services. No fluff, real screenshots, and the parts most tutorials skip.
What Pi-hole Actually Does
Pi-hole is a DNS sinkhole. It runs as your local DNS server, so every device that asks "what is the IP address for this domain" asks Pi-hole first. When the domain is on one of your blocklists, Pi-hole answers with a dead address instead of the real one, and the ad or tracker never loads. When the domain is legitimate, Pi-hole passes the question upstream and returns the real answer.
It started in 2015 as a Raspberry Pi project, which is where the name comes from, and grew into the default answer for anyone who searched how to block ads across a whole network. Because the filtering happens at the DNS layer, it covers devices that have no ad blocker of their own. Your smart TV, your kid’s tablet, the app on your phone that shows banner ads, all of it runs through the same filter with nothing installed on the device.
Version 6 of Pi-hole was a full rewrite. The old stack ran a separate web server and PHP for the admin panel. In v6 the web interface and the API live directly inside the core resolver binary, pihole-FTL, so there is far less to install and far less to break. If you are following an older guide and it mentions lighttpd or editing PHP files, that guide is out of date.
How the Blocking Works
The mechanism is simpler than most people expect. A blocklist is just a long list of domain names known to serve ads or tracking. Pi-hole loads those names into its resolver. When a query comes in for a name on the list, Pi-hole returns what the docs call the unspecified address, which is 0.0.0.0 for IPv4 and the equivalent empty address for IPv6. The requesting device sees that, gives up, and moves on. This is the default NULL blocking mode, and it is the recommended one because the client never even tries to open a connection to the blocked host.
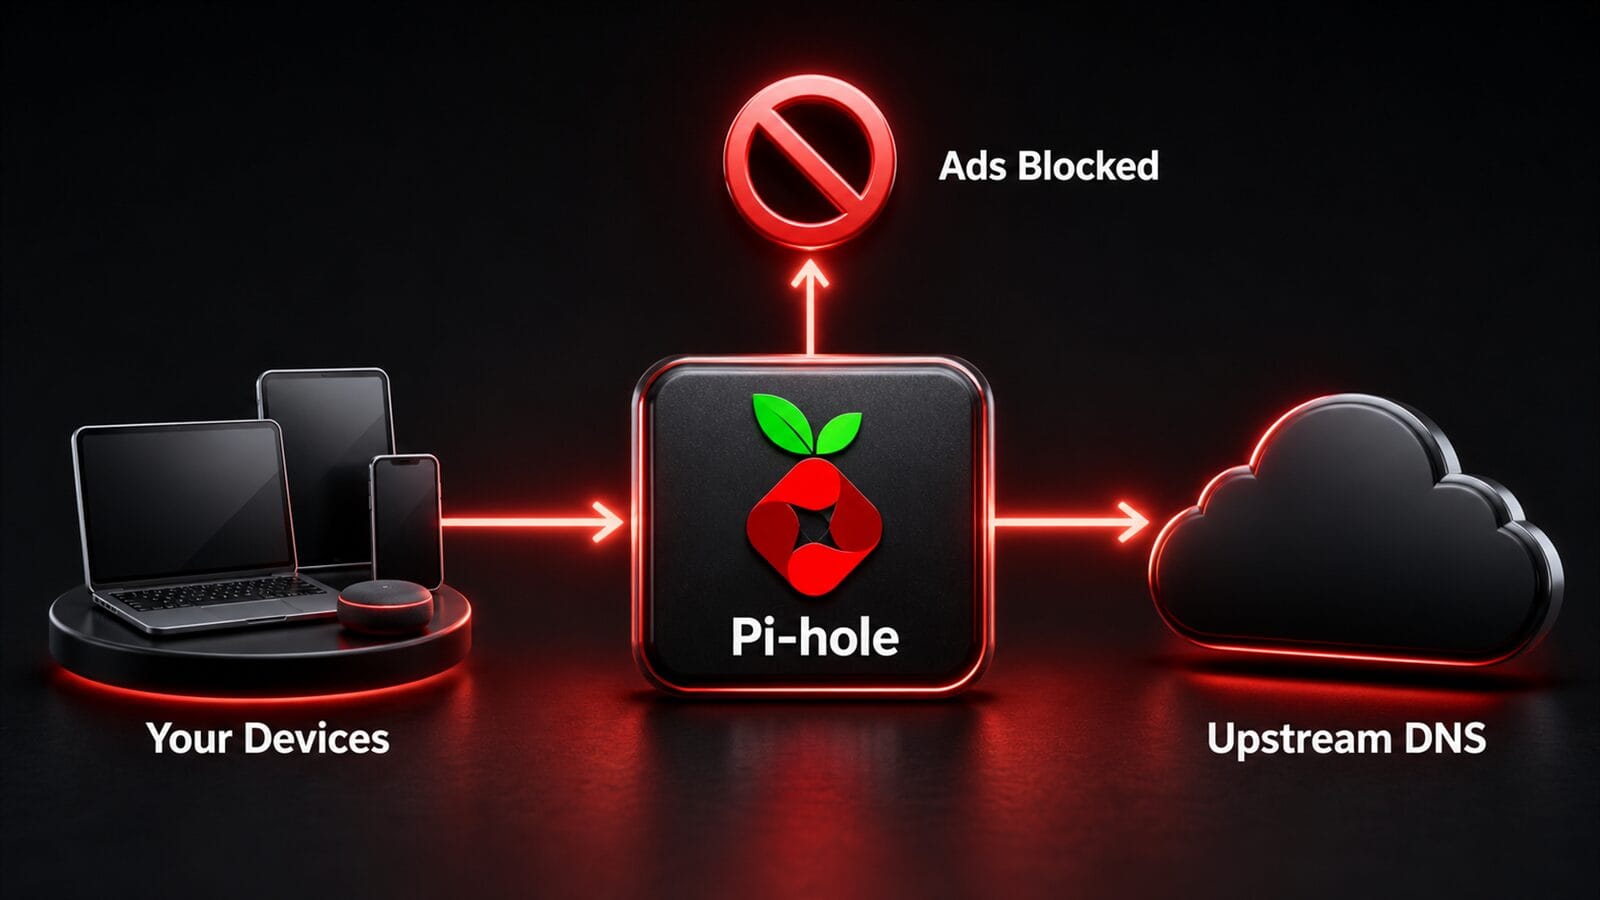
That is the important distinction between Pi-hole and a browser ad blocker. A browser extension strips ads out of the page after the page loads. Pi-hole stops the request before it ever leaves your network. The trade is that Pi-hole works on the domain, not the page element, so it cannot hide an ad served from the same domain as the content. That is why the two approaches pair well: run Pi-hole for network-wide coverage and a good browser blocker for the last mile.
What You Need
Pi-hole is genuinely lightweight. The official prerequisites call for 512MB of RAM and a couple of gigabytes of free disk, so almost anything will run it. The classic choice is a Raspberry Pi, and any recent model does the job with room to spare.
A Raspberry Pi 5 is overkill for Pi-hole alone but perfect if you want it to also run other homelab services. A Raspberry Pi 4 is the comfortable middle. And a Raspberry Pi Zero 2 W will happily handle a home network for the price of a sandwich.
You are not limited to a Pi, though. Pi-hole officially supports Debian, Ubuntu, Raspberry Pi OS, Fedora, CentOS Stream, Alpine, and Armbian, and the resolver ships prebuilt for x86_64, ARM, and riscv64. An old laptop, a spare mini PC, or a virtual machine all work. The one hard requirement is a static IP address, or a DHCP reservation on your router, because every device on the network is about to point its DNS at this machine and that address cannot change.
Installing Pi-hole
The official one-step installer is a single command:
curl -sSL https://install.pi-hole.net | bashPiping a script straight into bash is a fair thing to be nervous about, since you are running code before reading it. If that bothers you, and it reasonably might, the Pi-hole team documents two safer paths: clone the repository and run the installer from source, or download basic-install.sh, read it, then run it with sudo. All three end in the same place. The installer walks you through picking an upstream DNS provider and a blocklist, and it prints an admin password at the end. Write that down.
If you would rather keep it contained, the Docker route is first-class. Pi-hole publishes an official image and a quick-start compose file. A trimmed version looks like this:
services:
  pihole:
    container_name: pihole
    image: pihole/pihole:latest
    ports:
      - "53:53/tcp"
      - "53:53/udp"
      - "80:80/tcp"
      - "443:443/tcp"
    environment:
      TZ: 'America/Los_Angeles'
      FTLCONF_webserver_api_password: 'choose-a-strong-password'
      FTLCONF_dns_listeningMode: 'ALL'
    volumes:
      - './etc-pihole:/etc/pihole'
    restart: unless-stopped
Run docker compose up -d and Pi-hole is live. The volume keeps your settings and query history across container upgrades, so you can pull a new image whenever you like without losing anything.
Pointing Your Network at It
Installing Pi-hole changes nothing until your devices actually use it. There are three ways to make that happen, in order of how much you should prefer them.
Set it once on the router. This is the right answer for almost everyone. Log into your router, find the DHCP or LAN settings, and set the DNS server handed out to clients to your Pi-hole’s IP address. Every device that connects now gets Pi-hole automatically, with nothing to configure per device. Reboot a phone and check the Pi-hole dashboard: queries should start rolling in.
Let Pi-hole run DHCP. Some routers, especially ones from an internet provider, will not let you change the DNS server they advertise. Pi-hole has its own built-in DHCP server for exactly this case. Turn off DHCP on the router first, then enable it in Pi-hole, and Pi-hole will hand out addresses and point clients at itself in one move.
Set each device by hand. The last resort. You can point an individual computer or phone at Pi-hole in its network settings. Fine for testing on one machine, tedious as a permanent plan.
One catch worth knowing: the Pi-hole host itself does not route through Pi-hole automatically after install. If you want the machine running Pi-hole to also benefit from blocking, the docs show how to set it as its own upstream, with a sensible warning that if Pi-hole ever goes down, that host loses DNS along with it.
Reading the Dashboard
The v6 dashboard is where the payoff shows up. The top cards give you total queries, queries blocked, the percentage blocked, and how many domains are on your lists. On a normal home network you will see somewhere between five and fifteen percent of all DNS traffic getting blocked, which is a lot of connections your devices were making without asking you.
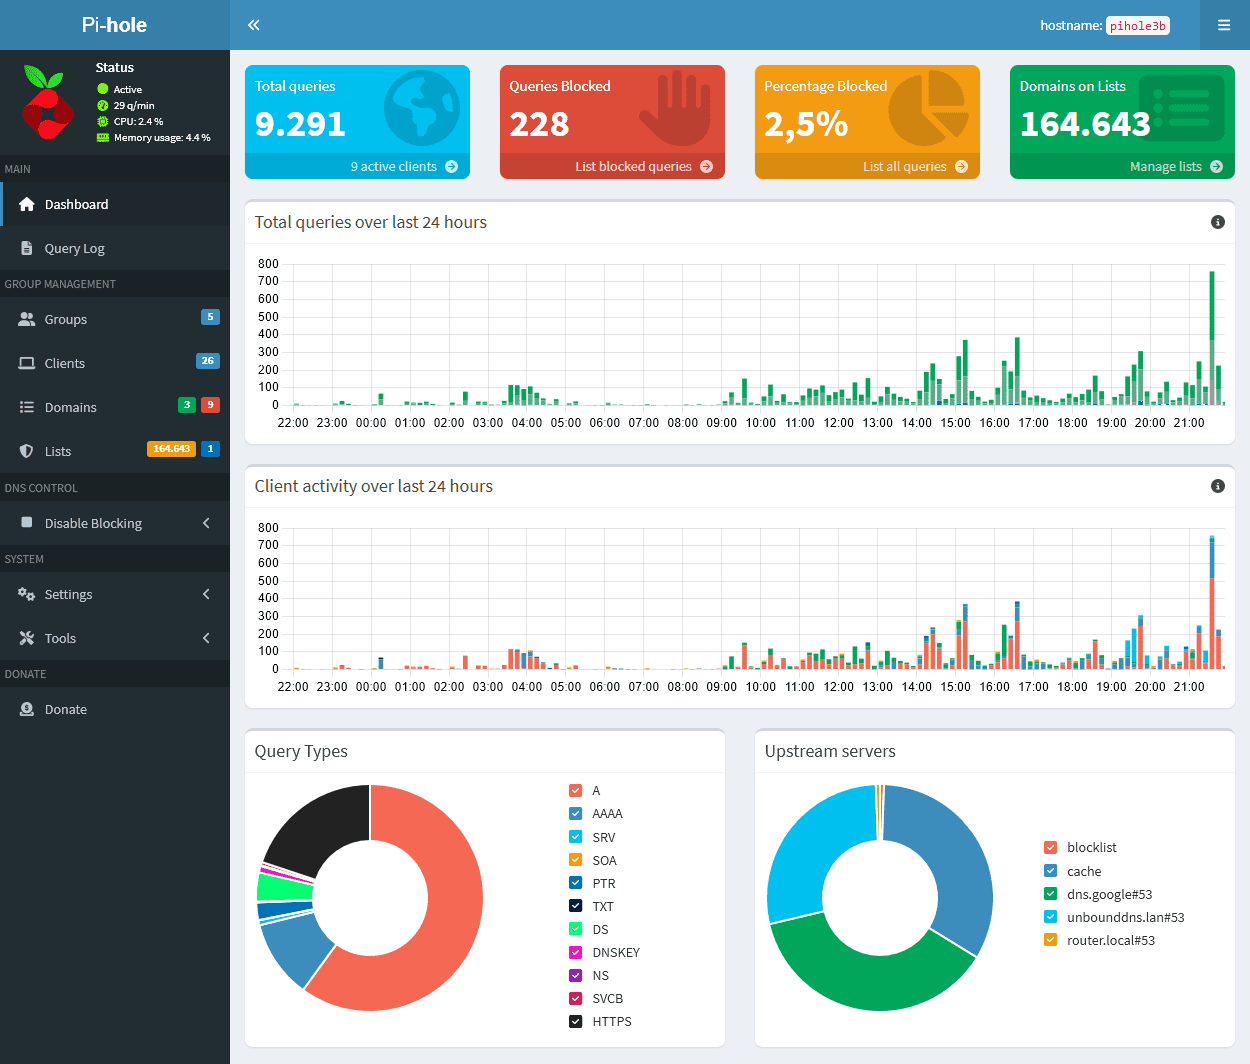
The graphs underneath break queries down over the last 24 hours and show which clients are the loudest. A smart TV or a phone that lights up the blocked count is usually phoning home to telemetry endpoints. This is the moment most people realize how chatty their gadgets actually are.
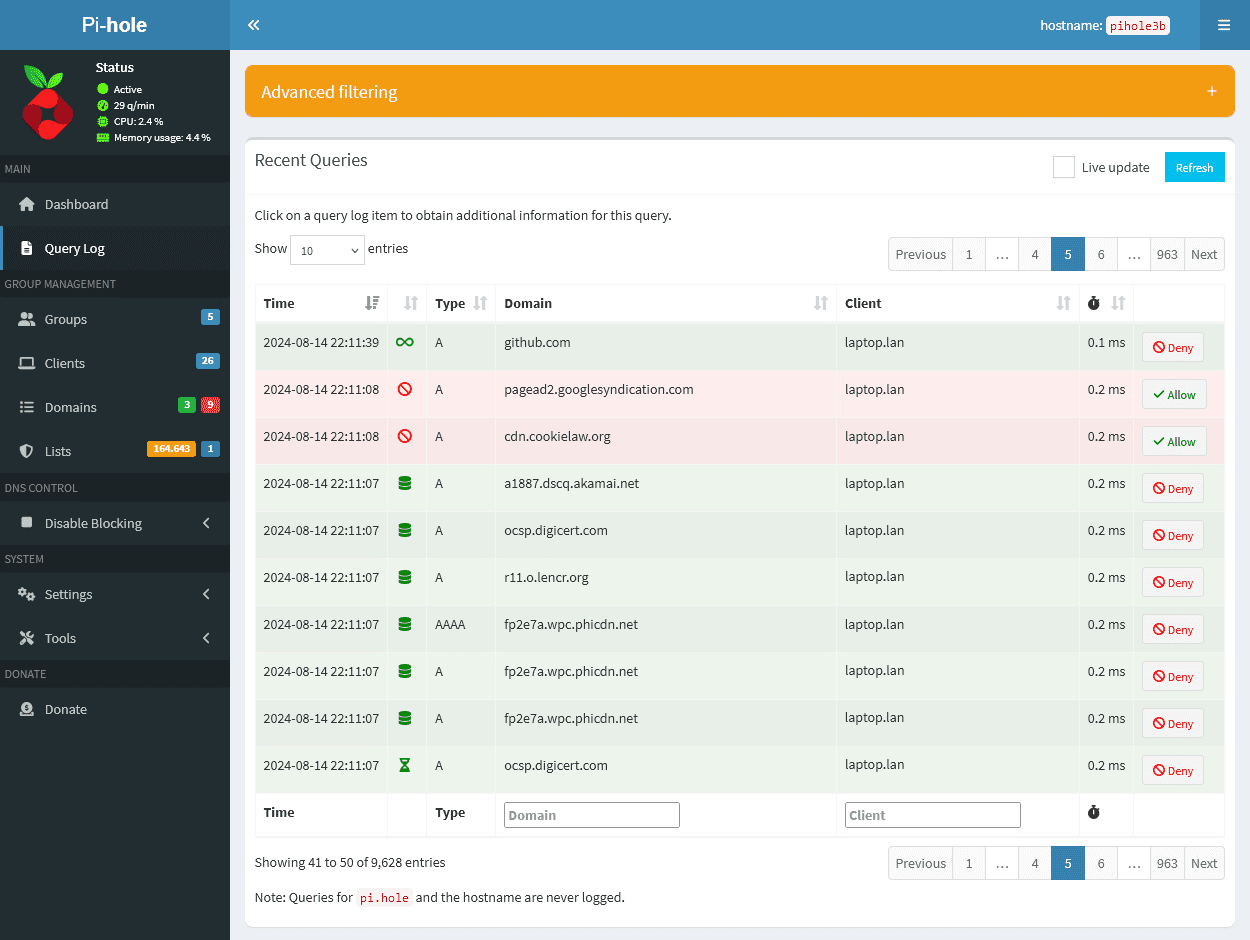
The query log is the tool you will keep coming back to. It lists every DNS request in near real time, with the client that asked, the domain, and whether it was allowed or denied. When a site breaks because a blocklist was too aggressive, this is where you find the domain that got caught and allow it in two clicks.
Blocklists, Groups, and Fine Control
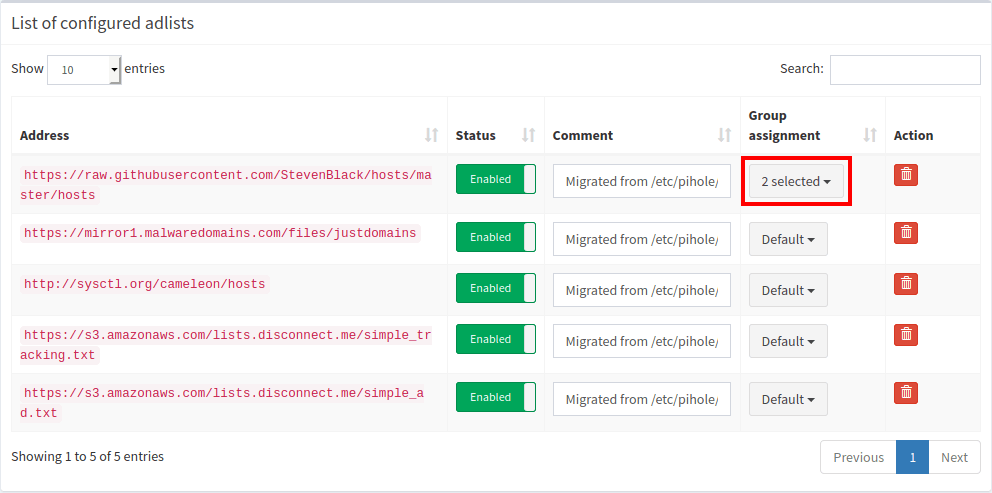
Out of the box Pi-hole ships with one solid default blocklist, and for a lot of people that is enough. When you want more coverage, you add more lists. The community-maintained collection at Firebog is the usual starting point, and it separates lists by how aggressive they are so you can add ticked, well-behaved lists without breaking half the internet.
Two good sources to know: The Firebog for curated, categorized lists, and Steven Black’s consolidated hosts project for a single well-maintained list that folds in the big reputable sources. Add a list, run the update, and Pi-hole pulls in the new domains.
The feature that turns Pi-hole from a blunt instrument into a real tool is group management. You can create groups, assign specific clients to them, and give each group its own set of blocklists and rules. In practice that means the kids’ devices get a strict list with adult content and game trackers blocked, while your work laptop gets a lighter touch so nothing breaks during a call. Same Pi-hole, different rules per device.
For the domains that lists do not cover cleanly, Pi-hole supports regex blocking, so you can block whole patterns of subdomains with one rule instead of chasing them one at a time. It is more power than most people need, and it is there when you do.
Going Further: Your Own Recursive Resolver
By default Pi-hole forwards the queries it does not block to an upstream provider like Cloudflare or Google. That works, but it means a third party sees every domain your network looks up. The Pi-hole docs frame the real question plainly: whom can you trust? If you would rather not hand your full browsing history to anyone, you can run your own recursive resolver with unbound and cut the upstream out entirely.
Before you commit to an upstream, it is worth knowing which one is actually fastest from where you are, since the answer changes by location. Our own DNS speed test at dnsrecon.io benchmarks the major resolvers side by side, and it has lookup, propagation, and DNSSEC checks for when you are debugging why a record is not resolving the way you expect.
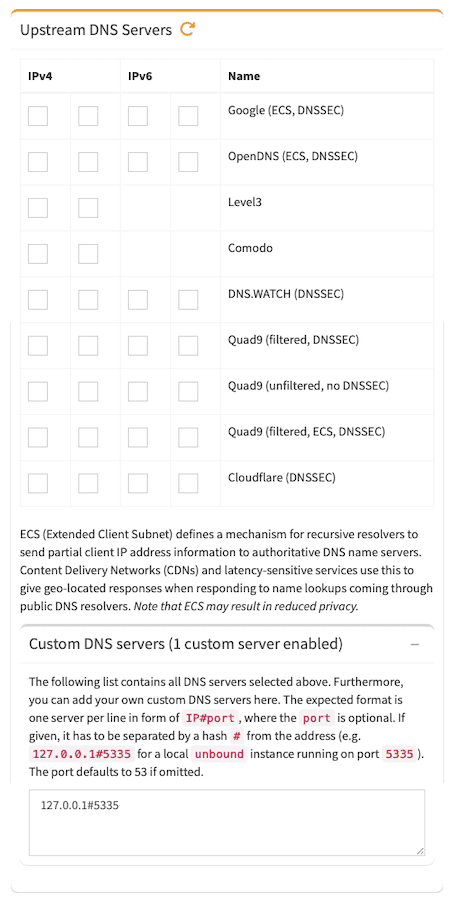
With unbound in place, Pi-hole stops asking a public server and instead resolves names the way the internet was designed to be resolved: by asking the authoritative servers directly, starting from the root. It is a few commands to set up, following the official unbound guide, and the result is a DNS setup that blocks ads and answers to no one but you. This is the point where a Pi-hole stops being a gadget and becomes real infrastructure.
The Alternatives Worth Knowing
Pi-hole is the most popular DNS blocker, not the only good one. Three others come up constantly, and each is the right pick for a different person.
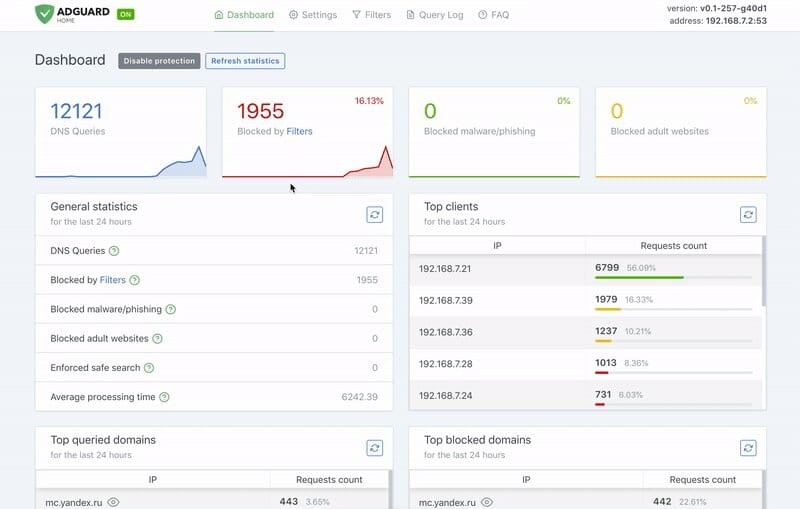
AdGuard Home is the polished challenger. It installs as a single binary with no extra moving parts, and unlike Pi-hole it ships encrypted DNS in the box: DNS over HTTPS, DNS over TLS, and DNSSEC all work without bolting on a second tool. Its parental controls and safe-search enforcement are a step ahead too. If you want the cleanest possible setup and encrypted upstream without configuring unbound, start here.
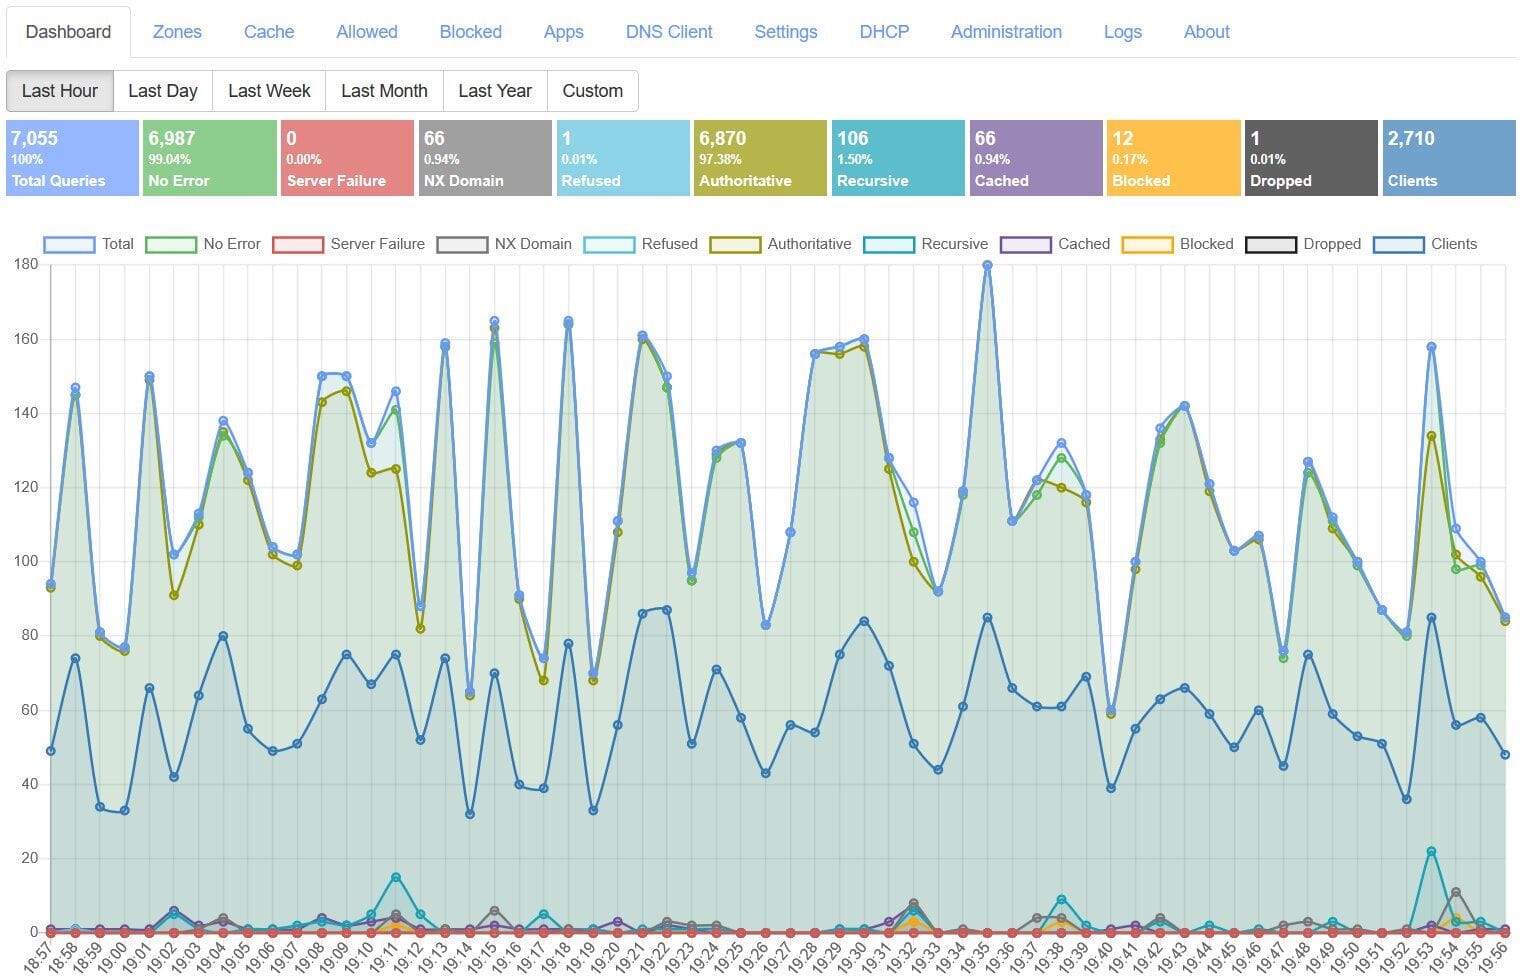
Technitium DNS Server is the power-user option. It is a complete DNS server that happens to include ad blocking, so on top of filtering it does authoritative zones, recursive resolution, clustering across multiple instances, role-based access, single sign-on, and self-hosted DNS over HTTPS, TLS, and QUIC. For a homelab that wants one tool to run all of its DNS, it is unmatched. For someone who just wants ads gone, it is more than they need.
NextDNS skips the hardware entirely. It is a cloud-hosted resolver you point your devices at, with the same kind of blocklists and threat feeds you would run locally, plus malware and phishing protection maintained for you. There is a free tier that covers a normal household. The trade is the obvious one: your queries go to their servers instead of staying on your network. If you do not want to run a box at all, it is the easiest way in.
For a full head-to-head on the self-hosted three, see our Pi-hole vs AdGuard Home vs Technitium comparison.
Common Problems
A site is broken. A blocklist caught a domain the site actually needs. Open the query log, find the denied domain from around when it broke, and add it to your allowlist. This is the single most common Pi-hole issue and it takes seconds to fix once you know where to look.
Queries show only one client. If the dashboard shows every request coming from your router’s IP instead of individual devices, your router is doing DNS forwarding in front of Pi-hole. Point clients at Pi-hole directly through DHCP, or enable conditional forwarding in Pi-hole so it can map requests back to the real device names.
DNS stops working entirely. If Pi-hole is your only DNS server and it goes down, the whole network loses name resolution. For anything you depend on, give clients a second DNS server or plan for the reboot. A Pi-hole that is also its own upstream is especially sensitive to this, so keep a recovery path in mind before you get fancy.
Keeping it current is one command, pihole -up, or a fresh image pull on Docker. The project ships security and stability updates regularly, so it is worth checking every so often.
References
- Pi-hole official documentation
- AdGuard Home
- Technitium DNS Server
- NextDNS
- dnsrecon.io DNS speed test and lookup tools
Related Posts
- Pi-hole vs AdGuard Home vs Technitium DNS
- uBlock Origin Gone From Chrome: What to Use Now
- Change Your Network Profile From Public to Private
Want network-wide filtering and monitoring set up properly for your business? Contact Rain City Techworks.